Getting you prepared for Mount Kilimanjaro
As with planning any adventure there is always research to be done! In this post i’ll give some information which will hopefully make the planning of your Mount Kilimanjaro trip a little easier along with some quick-fire tips and packing advice.
Booking your Kilimanjaro Trek – which route to take and what to look for in a tour company
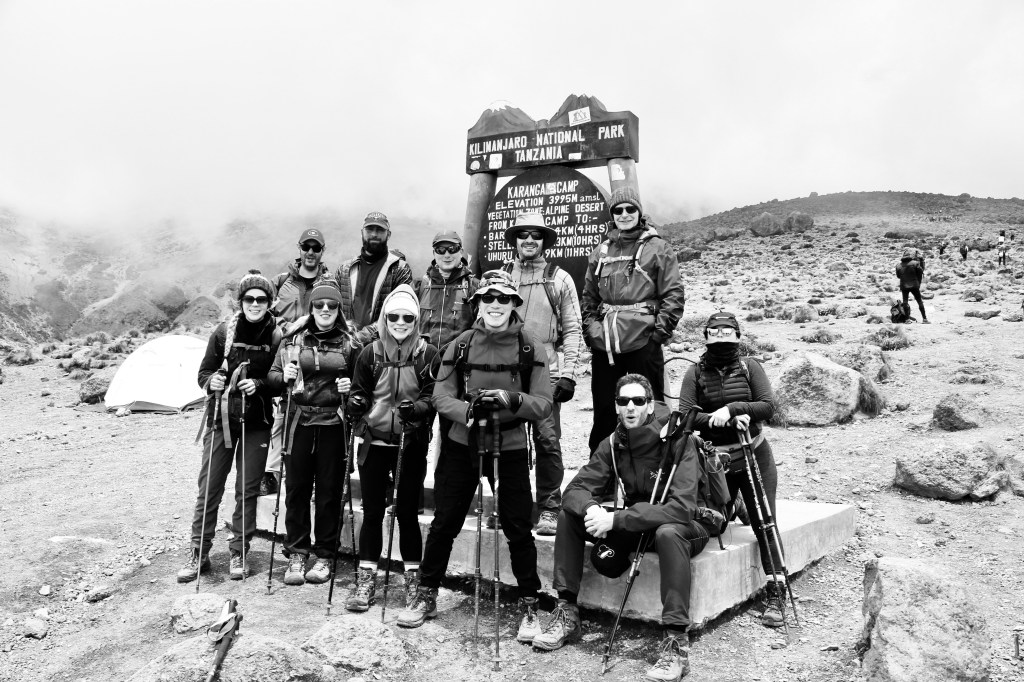
We chose to book the 8-day Machame Route with G-Adventures, the Machame Route is one of the most popular routes to take to the summit because it offers the most spectacular views along the way, and doesn’t take as long as some of the other routes such as Lemosho. The Machame Route isn’t the shortest trip either, but this means that the success rate of making it to the summit is higher. Whilst we took the 8 day trip, G-Adventures also offer a 9 day Machame Route trek to give that extra time for altitude acclimatisation. Although some of you may prefer to take a shorter route to the top, especially if you aren’t particularly keen on the idea of no shower for days in a row, please bear in mind that any additional time you can allow to make it to the summit will decrease your chances of experiencing altitude sickness, and consequently increase your chances of making it to the top! The success rate jumps from 44% to 64% to 85% between those taking 6, 7 and 8 day routes – check out https://www.climbkilimanjaroguide.com/kilimanjaro-success-rate/. Whilst I was lucky and didn’t get affected by the altitude, this may have been helped by the few days I spent in Nairobi prior to the climb as the city is at an elevation of 1795M. Now that i’m planning a second Kilimanjaro trip – more on this in my blog post The Majesty of Mount Kilimanjaro, we are opting for the longer 9 day Machame Route to give ourselves the extra time to acclimatise.
Tip #1 – Consider acclimatisation time when booking your trip. The longer you can take to reach the summit the better you will feel – pole pole (slowly) will become your mantra!
There are lots of tour companies providing Kilimanjaro trek trips and as I have only experienced G-Adventures, I have nothing to compare their offering to, however every single one of us in the group were thoroughly impressed with the crew, food and organisational expertise with which the G-Adventures team guided us. We received a thorough briefing on our arrival day in Moshi and felt truly supported throughout the whole climb. They also had some pieces of equipment to hire such as walking poles, sleeping bags and duffel bags which you may not want to invest in if you don’t do this sort of thing often.
If you’ve found my blog you are probably looking to travel as sustainably as possible. When i’m booking a holiday I want to have the best time possible, but I always try to think about what impact I will have on the local community and environment. Sometimes activities or trips that look fun are clearly not ethically sound. To make your trip to Kilimanjaro as sustainable as possible it is important to book the trip with a company who supports local workers and businesses, and who have an ethical ethos at the heart of their organisation. G Adventures for example, have the Planterra Foundation – https://planeterra.org/ . As more of us are trying to embrace ethical travel, tour companies should make this part of their core company values and these should be displayed on their website. If you’re in doubt about anything get in touch with the company, if they have nothing to hide they won’t mind the questions.
Tip #2 – Choose your trip provider carefully, travel with a company who employ local people, use the services of local businesses and have environmental policies in place. A good place to find this information is on the company website. You can also check out the reviews of previous travellers, if the company is not operating in the most socially and environmentally sustainable way, often other travellers will have picked up on this.
Cut the cr*p – time to talk toilets
When I was travelling around South East Asia in my early 20s, my friends and I were in a toilet queue when a girl came out of the toilets, rushing past the attendant whilst proclaiming to all of us who were waiting for the loo that we should “never pay to pee!”. The phrase stuck with us and has been a running joke now for almost 10 years. Kate, who was with me on this memorable day in Thailand some 9+years ago was also travelling with me to Kilimanjaro and so, we were obviously inclined to do the trip without the paid-for toilets that many tour companies offer. We were happy enough to pop a squat or use the permanent camp toilets, we thought it was more in the spirit of adventure to veto the luxury of a personal potty. We were, quite frankly, wrong and thankfully in the welcome meeting we were outvoted, in the case of Kilimanjaro – always pay to pee!
Some of you will have read about the option to pay for dedicated camp toilets elsewhere on the web, for those who don’t know what I’m talking about, many tour companies offer the option of paying an additional fee for portable toilets that are dedicated to your group. What we didn’t realise was that this is a group decision – you either all chip in and share the facilities or all go without. We were a group of 11 and, as the majority voted in favour of the toilets, we split the cost between us which worked out at $35 each and was probably THE best $35 I spent during the entire holiday. To paint a picture of the campsites for you, there are typically many tour groups at each campsite with only 1 block of toilets to serve everyone, therefore, it’s likely that your tent won’t be anywhere near the toilet block. You will almost definitely need to pee at least once a night because of the amount of water you need to drink to acclimatise to the altitude, and so, without the dedicated portable loos you will find yourself having to navigate your way to the malodorous toilet block by way of head torch and moon light. Once inside, you will need to be sure not to lose your balance as you hover over the hole in the floor and pray that the brown sludge surrounding the hole is mud and not poop (you will have to really use your imagination here!). The portable toilets are, in contrast, right by your tents and kept clean by ‘toilet engineers’, you can sit down and there’s loo roll…after all those hours of walking, having a clean toilet greet you at camp is a nice reward. And for those of you who enjoy the liberation of a ‘nature wee’, don’t worry, there is plenty of opportunity to squat behind a bush as you’re walking.
Tip #3 – Pay the additional fee for the portable toilets – you won’t regret it!
Fitness & Altitude Sickness
A good level of fitness is required to complete the trek. The walking pace is very slow to allow time for acclimatisation but you will be walking for hours, day after day, whilst carrying your daypack. On top of these long hours of walking, you are also taking in less oxygen than most of us are used to in our daily lives due to the higher altitude. So, whilst you don’t need an athlete’s level of fitness, it’s a good idea to incorporate some relatively intense cardio workouts as part of your training. This will help increase your body’s capacity to utilise the oxygen in the air around you, (your VO2max for anyone with a fitness tracker), and will help to prepare your body for the lower oxygen levels you will experience. As a guide I typically visit the gym 5-6 times a week and take classes including spin, HIIT and weight based workouts, and I didn’t struggle with the walking pace or distance.
Frustratingly, this isn’t a fool-proof formula for preventing altitude sickness. From what I have read and the experience of those within my group, altitude sickness is not something that you can prevent by attaining a certain level of fitness. It isn’t fully understood as to why some people experience symptoms of altitude sickness and others don’t, I was unaffected, but my friend Kate, a sub-4:00h marathon runner, felt it hit her on the approach to basecamp and proceeded to throw up numerous times on the walk to the summit. Less than ideal. Whilst altitude sickness is not pleasant, it is very normal to experience some symptoms and if you are afflicted it doesn’t mean you won’t reach the summit. Within my group 5 people vomited on the ascent from basecamp and all 5 reached the summit. But, whilst there are not guarantees, there are things that you can do to try to mitigate altitude sickness and ease its effects which leads me onto my next tip:
Tip #4 – Listen to your guides, they are the experts and will have hiked to the summit on numerous occasions. Take their advice.
-Drink a minimum of 3 litres of water a day – having a water bladder will make it much easier for you to drink whilst walking.
-Pack some anti-nausea tablets to relieve symptoms if you are affected.
-Finally, a positive mental attitude and can-do spirit will be what takes you all the way to the top. You’ve totally got this!
Practical tips for your climb
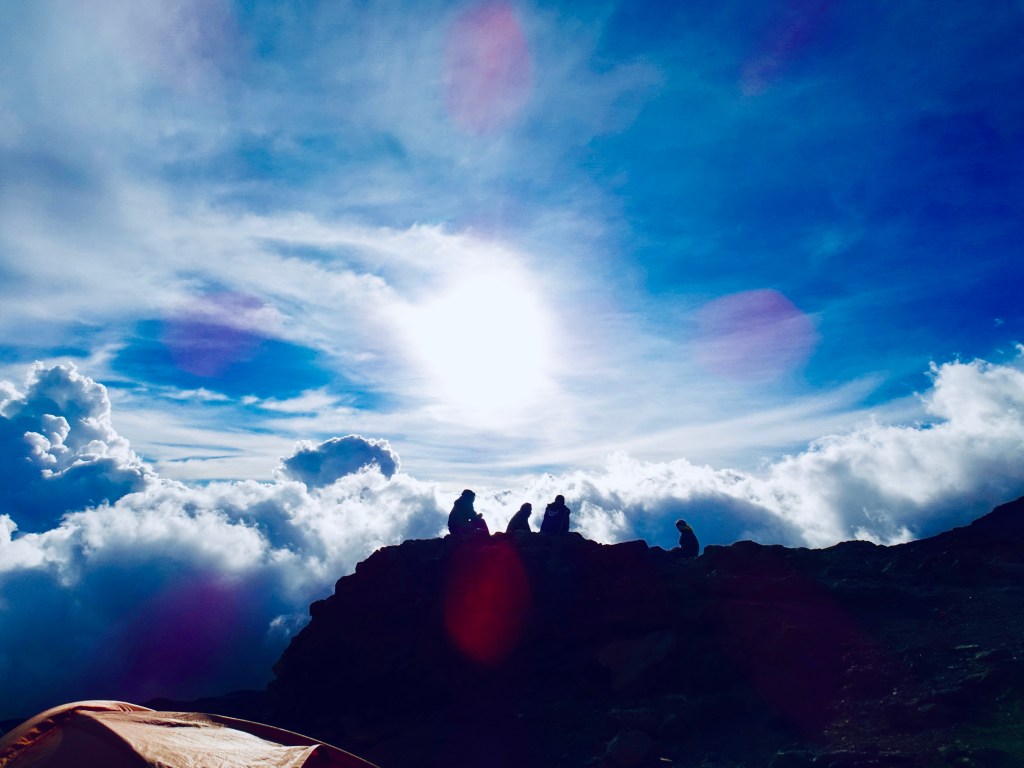
Depending on the time of year that you make the climb the walk to the summit could be made whilst battling against a pretty chilly wind. Resembling something like the Michelin man, I walked from basecamp to the summit dressed in 8 layers on my top half, 5 on my bottom half, 2 pairs of socks and gloves, a balaclava, snood and wooly hat, and I can assure you that it was not overkill. In fact, about 4 hours in when the wind was blowing a chilly -15C, I realised that I couldn’t feel my hands and convinced myself that I was going to lose fingers due to frostbite. As I was frantically trying to squeeze heat pads into my gloves, one of our fantastic guides rescued me with a spare, super thick pair that he was carrying. The moral of the story? More is more!
Tip #5 – Pack clothing that you can layer up, and wear a couple more layers than you think you will need when walking to the summit- better to have it and take it off than leave it in your tent and need it.
The long way down
The descent will be fairly easy, especially after your mammoth walk through the night to reach the summit, the main discomfort on the way down will be knees and toes. Your walking poles will be of great use in reducing the impact on your knees and having well trimmed toenails will prevent you losing any!
Tip #6 – Have well trimmed toenails especially for the descent, it will avoid any discomfort or lost/blackened toenails.
Packing List
How much of each item you take will depend on the length of your trip. Bear in mind that you will have a weight limit on how much you can take with you. This rule is implemented by those who manage the mountain and is there to protect the porters.
Body
-Base layer top and bottoms. Merino wool is pricey but a very good, breathable fabric. Gym leggings and tops made of fabric that wicks away sweat are other good options.
-Activewear shorts and/or leggings and vests/t-shirts for the first 2 days when the temperature is fairly warm.
-Waterproof shell jacket and overtrousers. You will need to have these with you at all times in your daypack in case of sudden downpours, pick items that are light and will fold up into small bundles. (N.B. ‘waterproof’ and ‘water resistant’ are not the same). The waterproof jacket will double up as a windbreaker – ideal for the walk to the summit.
-Fleece lined trousers. Ideal for the walk from basecamp to the summit.
-Fleece jacket
-Down filled jacket
Feet
-Liner socks. These go under your hiking socks, ideally you want a clean pair for each day. If you don’t know what these are, pop into your local outdoor shop and they should be able to help.
-Hiking socks. I used Smartwool socks in medium crew for all days except the walk to the summit when I wore a heavy crew pair.
-Walking boots. Take a pair that you’ve worn a good few times to try to prevent blisters.
-Trainers or sandals. To wear when you’re at camp.
Hands
–Inner gloves. Gloves made from a thin fabric that you can wear under heavier gloves. If your hands feel cold easily you may want to take 2 pairs of these.
-Outer gloves. Choose a pair that are windproof and will give enough protection to your hands in temperatures of around -15 celsius. You will be gripping onto your walking poles and so won’t be able to put your hands in pockets to protect from the cold.
Head & Neck
-Buff / snood / neck warmer
-Balaclava
-Baseball cap
-Woolly hat
Equipment
-3 litre water bladder
-750ml/1 litre water bottle. You will need the water bladder and a bottle, the water bladder makes drinking as you move much easier, especially as you have to consume a lot, but this will likely freeze as you reach the summit so a water bottle is required too. A good option is a metal bottle e.g. Sigg, as you can put hot water in at night so it doubles as a hot water bottle.
-25-35 litre capacity rucksack. This will be your daypack so make sure it’s comfortable. I recommend buying a pack with chest and hip straps to help distribute the weight more evenly across your torso. The hip straps often contain a zip pocket which will be very useful for items you want to use as you walk such as hand sanitiser, suncream or lip balm.
-Waterproof rucksack cover. Lots of daypacks will include a built-in waterproof cover but if yours doesn’t come with one it’s a good idea to buy one to prevent your items getting soaked if the heavens open!
-Small carabiner clips. Good for clipping things onto your daypack or hanging things up in your tent.
-Swiss army knife / small tool kit.
-Walking poles. These can normally be hired from your tour operator if you don’t have your own.
-Duffle bag/ large rucksack. A duffle bag can normally be hired from your tour operator. This will be what you pack your clothes and other items in that you don’t need during the day and will be carried for you by the porters.
-Sleeping bag. Must be suitable for minus temperatures – you may be able to hire one from your tour company.
-Sleeping bag liner. Only required if you are hiring a sleeping bag, for hygiene reasons.
-Head torch
-Small travel towel
-Portable charger
-Camera
-Book
-Ear plugs for sleeping
-Eye mask for sleeping
-Electrolyte tablets. I recommend Nunn tablets as they flavour the water too.
-Water purification tablets. I didn’t end up using the tablets I took as the tour operator provided purified water, however this may not be the case with all companies so it’s worth having some with you.
-Anti-nausea tablets. Will help you carry on walking if you start to feel the effects of altitude sickness. Speak to your local pharmacist about these.
-Hand and feet warmers. These are disposable but certain brands are biodegradable. Alternatively Lifesystems do sell reusable hand warmers. If your tour company can accommodate putting these into a pan of boiling water for you each night they are the most eco-friendly option.
-Wet wipes. Biodegradable ones are a must but please do some research to find wet wipes that are home compostable as you can’t be sure where the rubbish you generate is taken. Without getting too technical, home compostable products are made to break down into non toxic components in everyday, natural environmental conditions. An option I found are Mum&You 100% Biodegradable Wet wipes. Take something to put used wet wipes in too to avoid littering them on the mountain.
-Hand sanitiser
-Other toiletries of your choice.
-High energy snacks. Good options are cereal bars, energy gels, hard boiled sweets, jelly babies, dried fruit and nuts.